IDE support
Kapua uses a standard Maven setup for building. So it should be possible to work on Kapua with any IDE.
The following sections describe ways to set up different IDEs to work best with Kapua.
Eclipse - manual setup
As a pre-requisite you will need:
- Java 8 with the JDK installed on your local machine
- A working internet connection
The following steps have to be performed
Download and install the Eclipse IDE
The Eclipse IDE can be either downloaded as a package from https://www.eclipse.org/downloads/eclipse-packages/ or it can be installed using the Eclipse Installer.
As of now the current version of Eclipse is "Neon". It should be possible to use future versions of Eclipse in the same way, but this guide focuses on "Eclipse Neon.3".
Either way you will have the possibility to choose which edition of the Eclipse IDE you would like. While it is possible to extend any edition of Eclipse with additional plugins to feature the same functionality, it is recommended to start with the "Eclipse IDE for Java EE Developers" as it already contains most plugins supporting the development already.

After the Eclipse IDE has been installed or extracted (depending on the method of installation) start it up with a new, empty workspace.
If you already have a working Eclipse IDE installation it is also possible to re-use this. You can run the same instance with multiple workspaces.
Install additional plugins
There is a set of plugins for the Eclipse IDE which help in the development process. And while they are not required, it is recommended to install them in order to simplify the development process.
Those plugins have to be installed before importing the source code into the Eclipse workspace, as they won't get activated properly for each project otherwise.
Kapua uses a plain Maven setup and this does not make use of checked in project configurations. However the Maven integration of Eclipse can detect settings from Maven plugins and configure Eclipse to behave in the same way, re-using the Maven configuration. But for this to work, it is best to install extension plugins before the initial import of the Kapua source code into the workspace.
Some of the following plugins can be installed from the Eclipse Marketplace or, when viewing this documentation as HTML, by dragging the install buttons below directly onto the Eclipse IDE window:
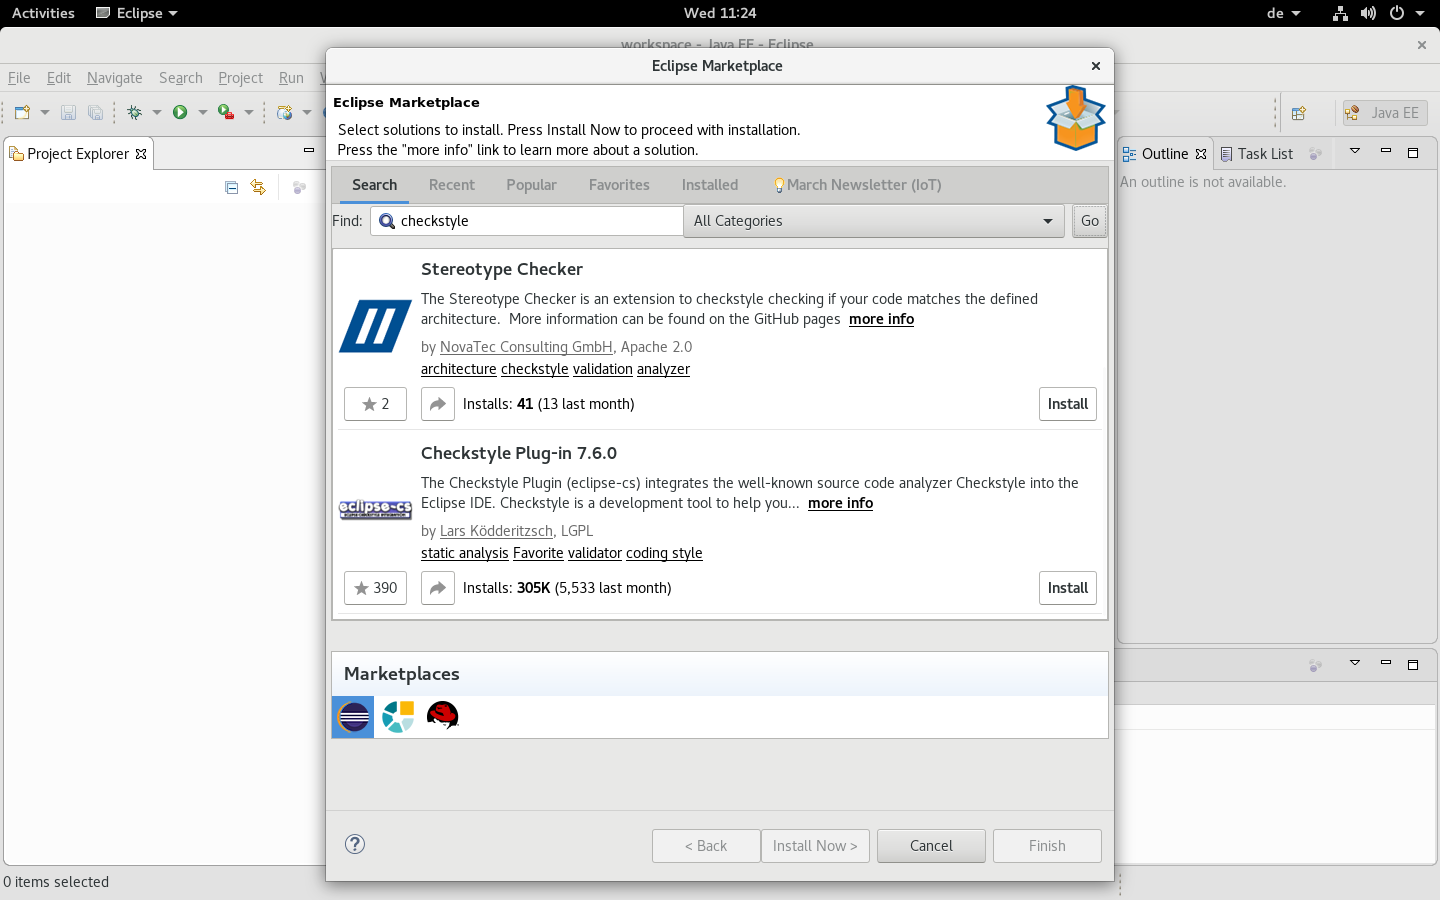
- EclEmma
- Eclipse Checkstyle Plugin
- YEdit
EclEmma is a plugin that can analyze code coverage when running unit tests.

Kapua uses checkstyle during the build to ensure that some common pitfalls are detected during the build. This plugin will show those errors already in the IDE once the file is saved.
YEdit is a YAML editor for Eclipse. It can help to edit the different YAML files which Kapua uses.
Check out from GitHub
Eclipse Kapua is hosted in the GitHub repository eclipse/kapua. There are different
ways to clone repositories from GitHub (HTTPS, SSH, direct, forked) the following sections assume that you are
cloning a direct copy using HTTPS. For this the URL is https://github.com/eclipse/kapua.git.
Switch to the Eclipse Git perspective and create a new clone from the URL above. Use the develop branch for
the most recent development.

Importing projects
After the repository has been cloned switch back to the "Java EE" perspective, right click in the empty "Project Explorer" view and select "Import…".
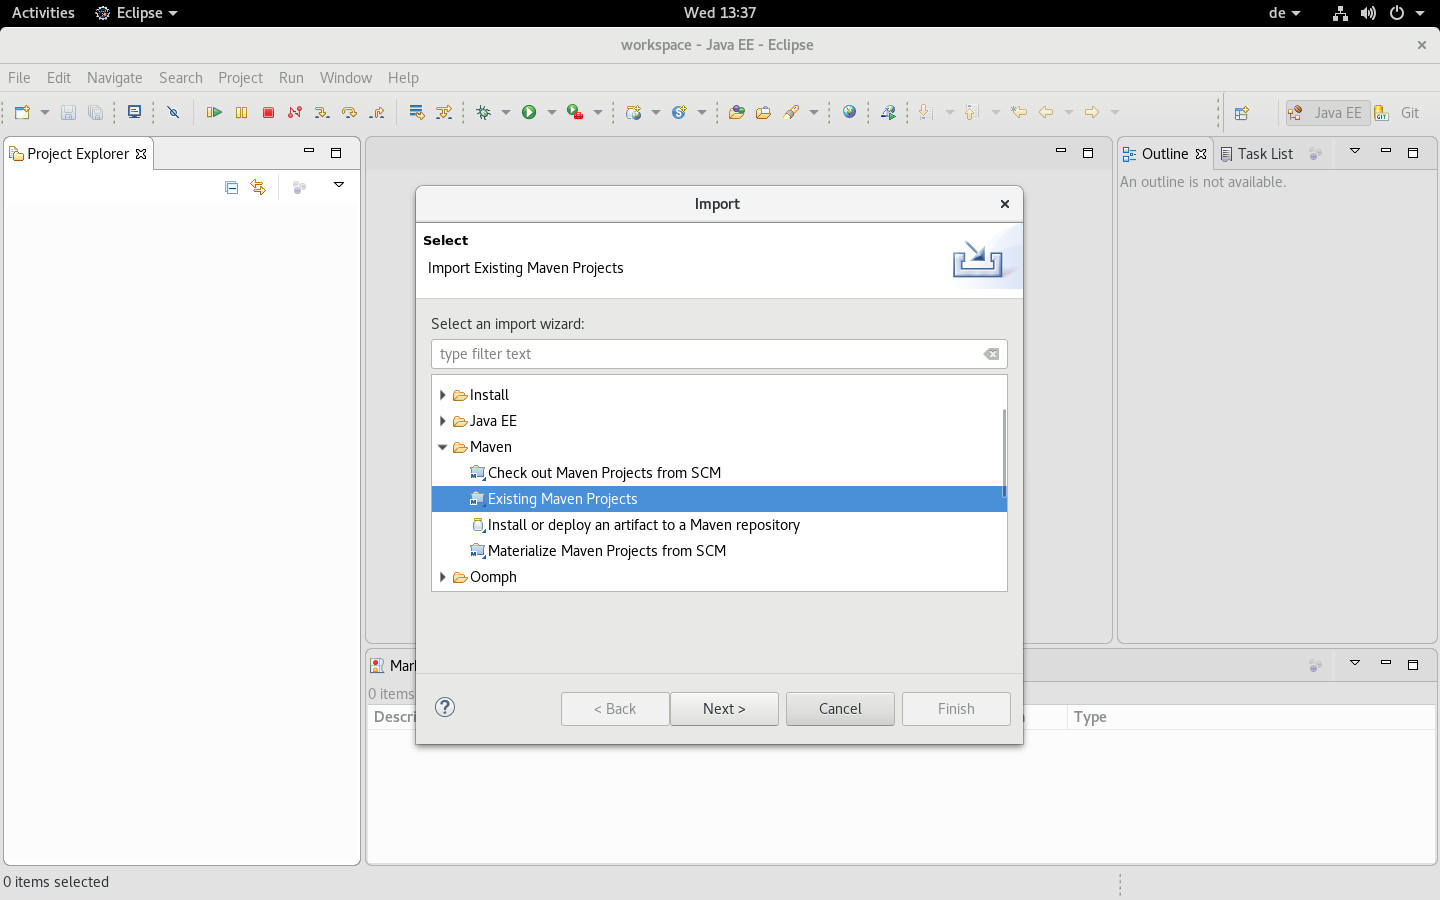
Browse to the location where you cloned the Git repository to and select the directory.
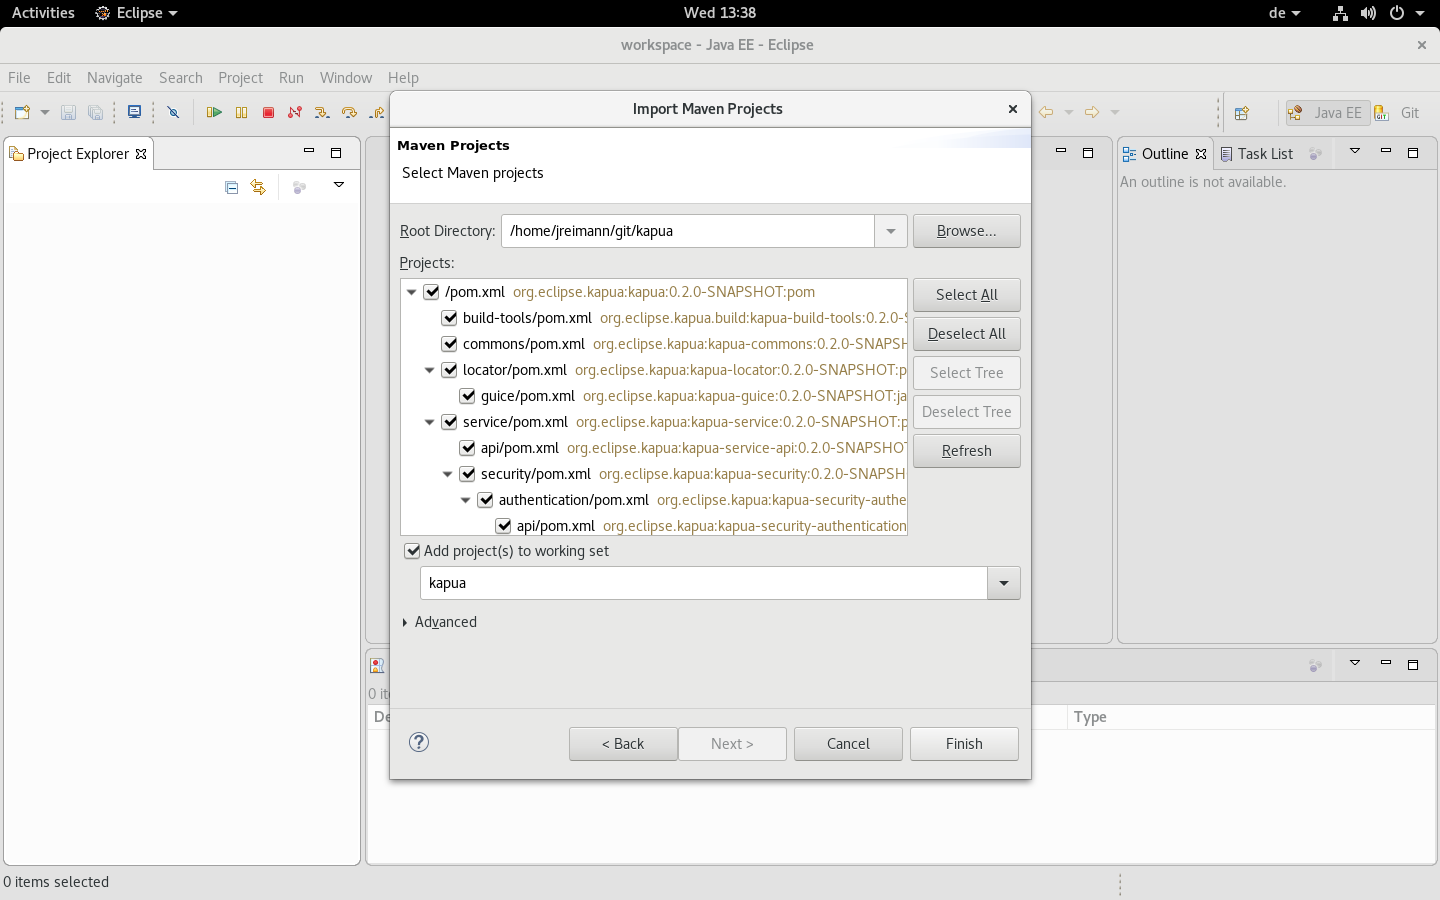
The actual import process may take a few minutes as required artifacts will be downloaded from Maven Central and the Eurotech Maven repository.
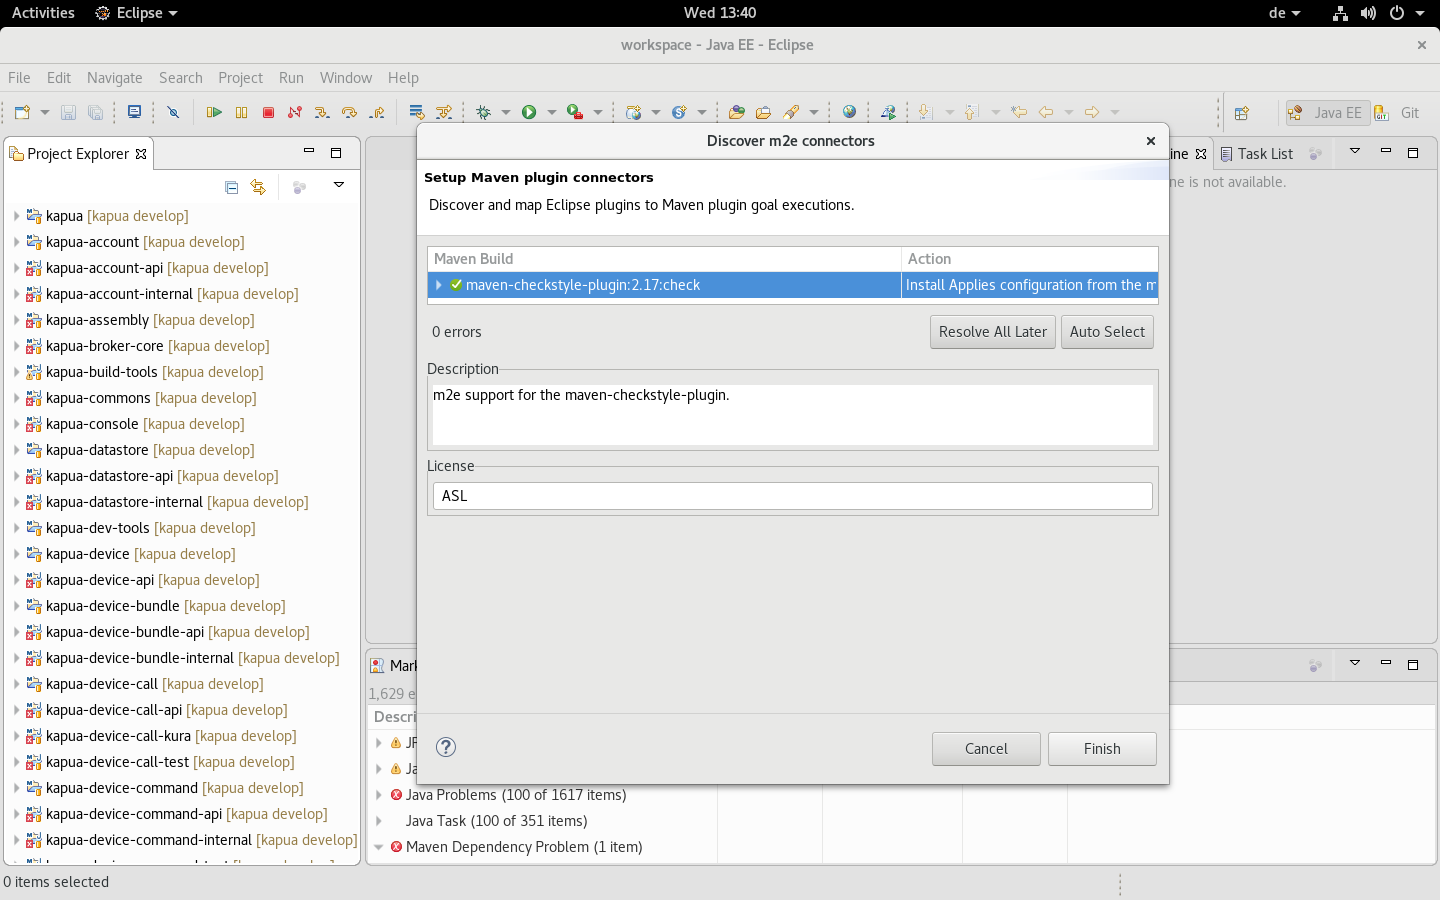
Finally a dialog might ask you to install additional Maven connectors, allow it to install necessary/missing connectors so that they are available in the Eclipse IDE and configuring the newly imported projects. This process may ask you to restart the Eclipse IDE instance. In this case answer "yes", the import process will continue after the restart. Be sure to give the process a bit of time after the restart.
Initial build
In order to fix errors on the kapua-console project you will need
to run a full build on the project. Right click on the kapua project
and select "Run as" -> "Maven build…". In the following dialog enable the
checkbox to skip tests and press "Run".
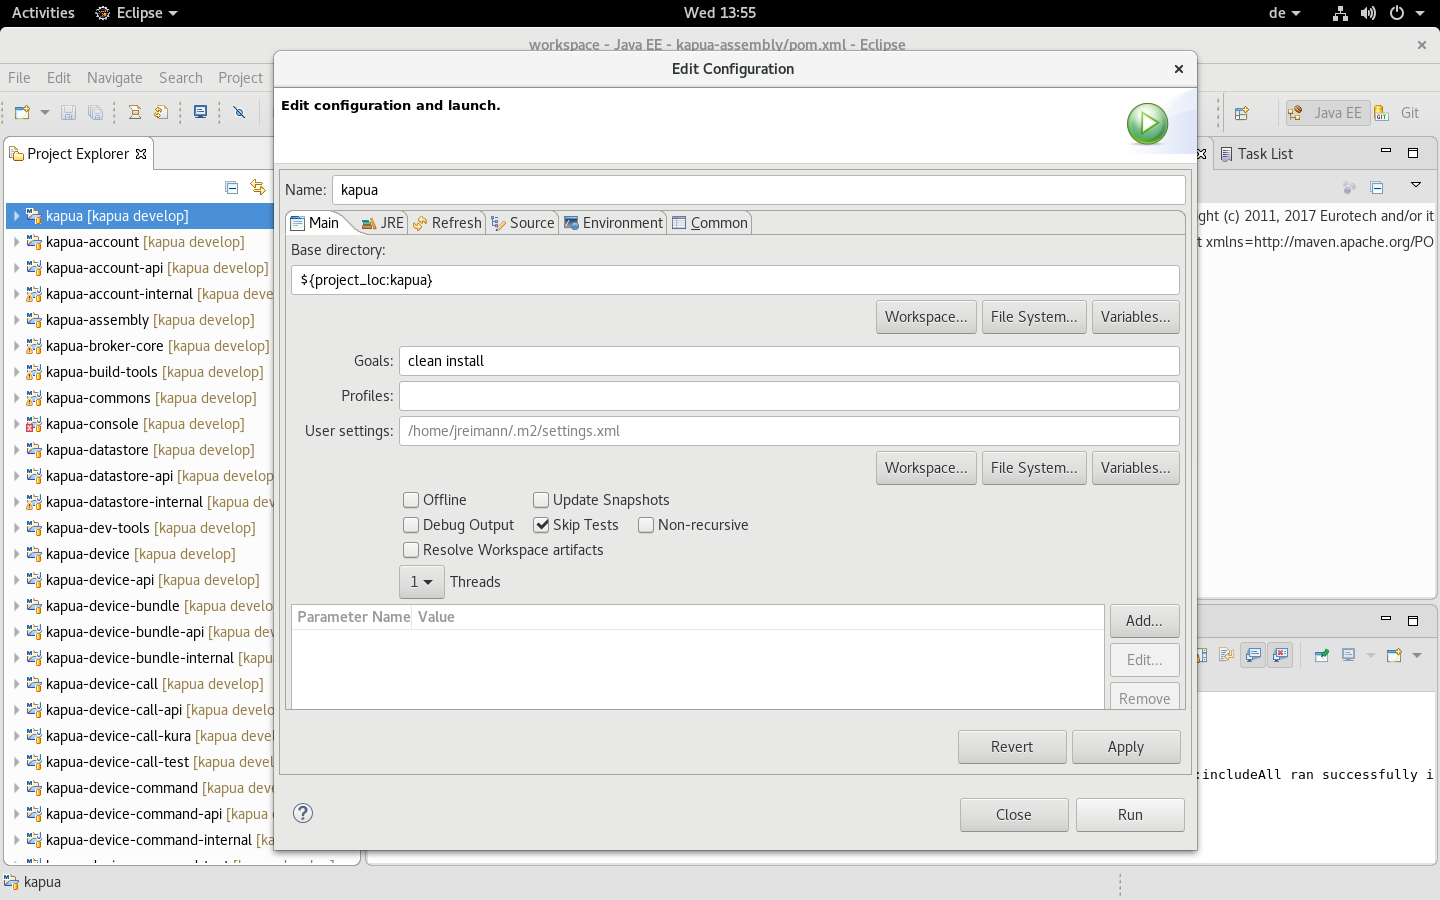
The initial build will take again a few minutes. Afterwards refresh the
kapua-console project (e.g. by selecting and pressing "F5").
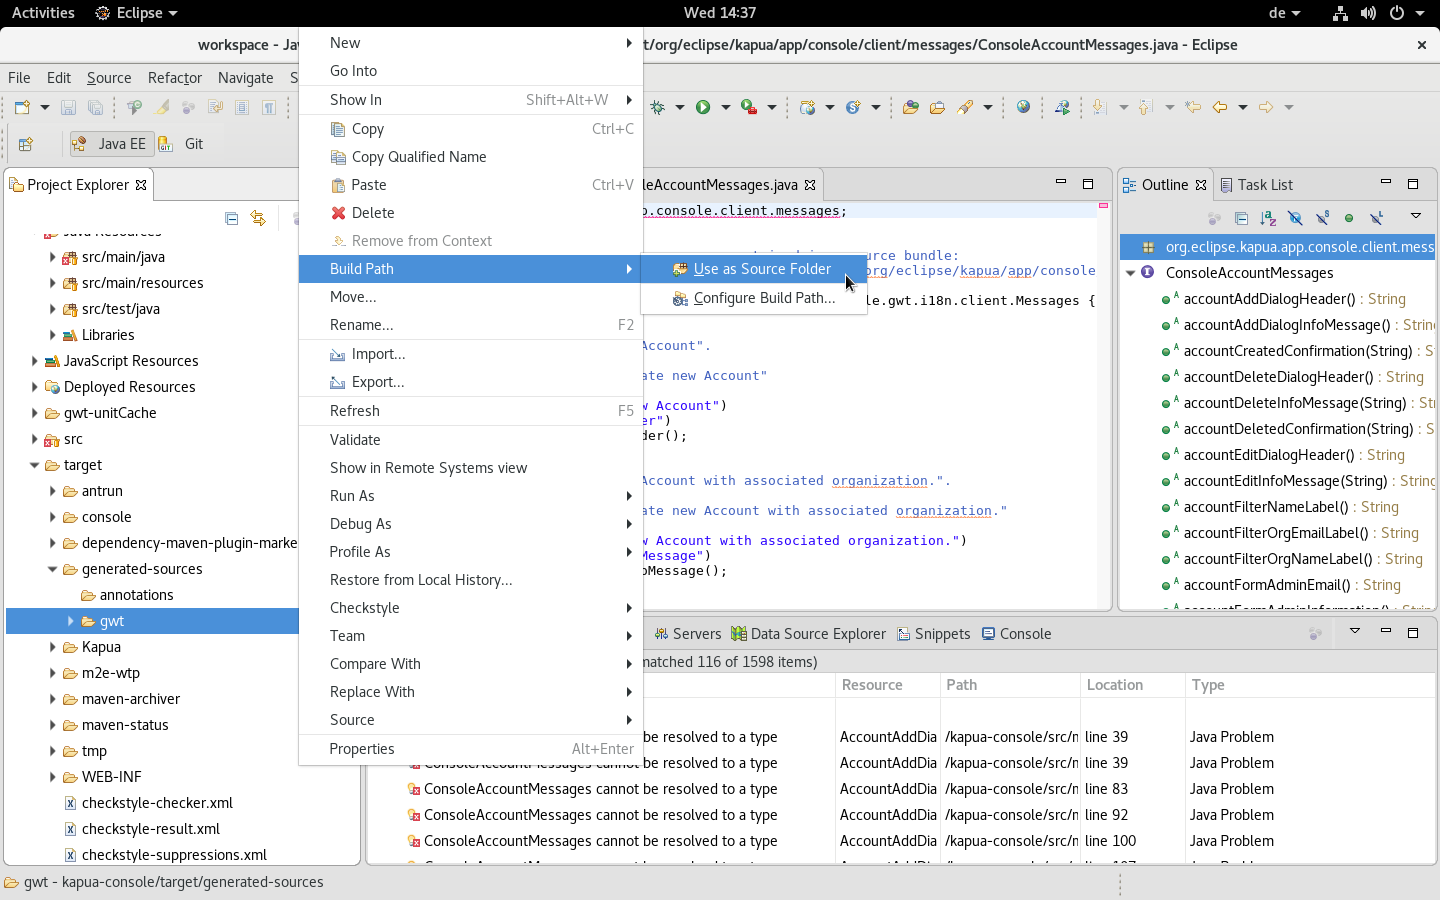
Add the target/generated-sources/gwt to the build path of the
project: